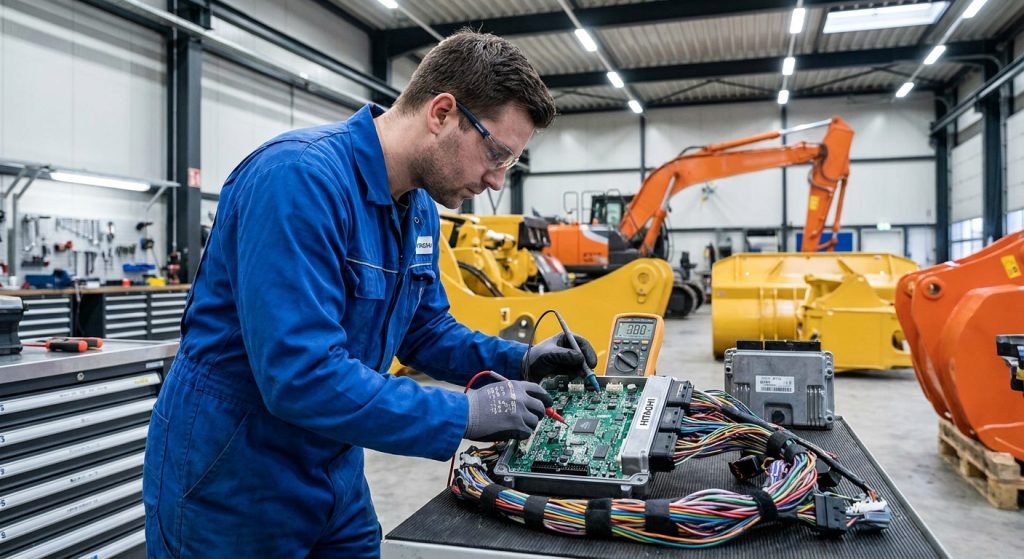
Hitachi excavators—from the classic EX200 series to modern ZAXIS ZX200, ZX210, and ZX330 models—rely on central electronic controllers to balance engine output with hydraulic demand. When an excavator’s computer board malfunctions, the machine can instantly lose power, lock up hydraulic functions, display communication alarms, or refuse to crank altogether.
For independent heavy equipment repair shop owners and fleet mechanics, electronic failures present a double-edged sword. Diagnosing a controller failure incorrectly leads to unnecessary replacement costs, whereas misdiagnosing a damaged wiring harness as a good board can ruin a newly installed controller in seconds.
This technical guide outlines the architecture of Hitachi excavator controllers, breaks down essential diagnostic trouble codes (DTCs), provides an ordered 5-step troubleshooting sequence, and details preventive maintenance practices to eliminate controller burnouts.
Architecture of Hitachi Excavator Electronic Control Systems
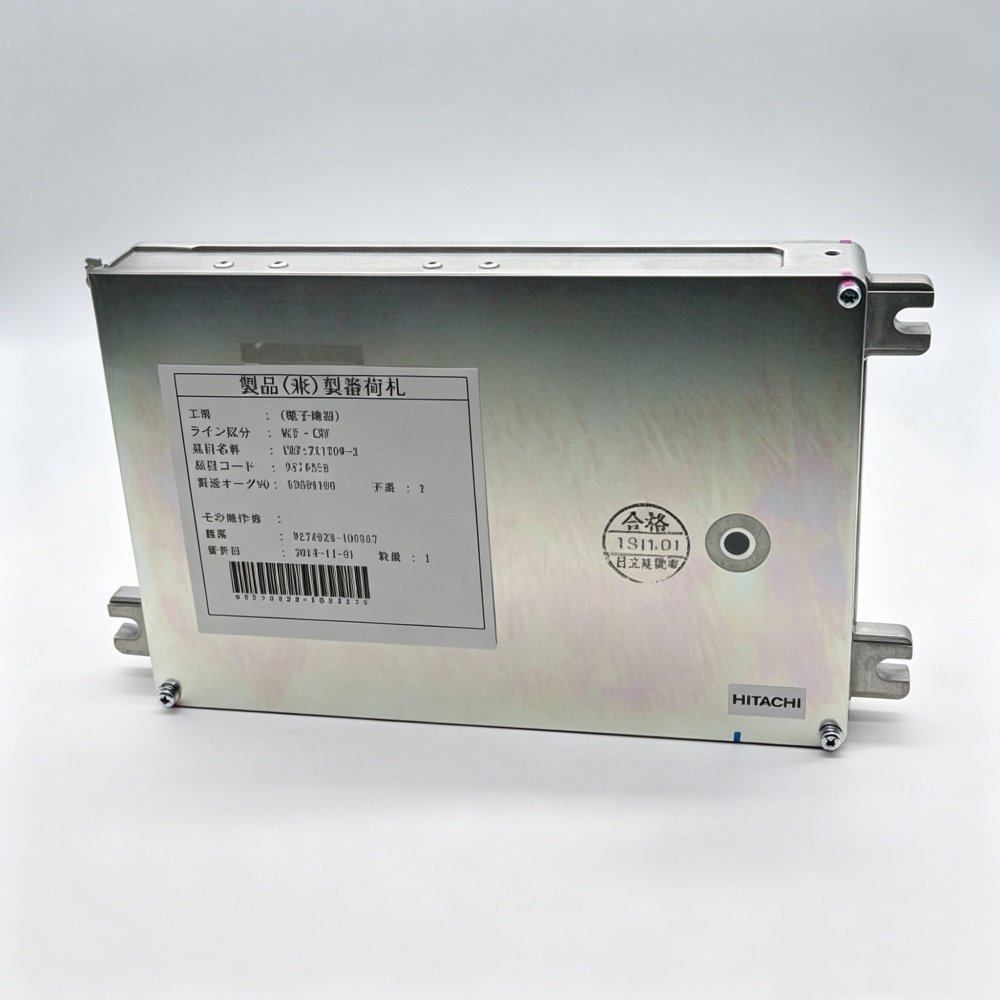
Modern Hitachi excavators utilize a dual-controller framework to separate hydraulic power management from engine fueling and emissions control:
- Main Controller (MC): Acts as the primary hydraulic coordinator. The MC receives inputs from the engine speed dial, pressure sensors, and pilot control switches. It regulates the hydraulic pump displacement solenoids, swing brakes, and travel speed valves.
- Engine Control Module (ECM / DCU): Coordinates electronic fuel injection, common rail pressure, and turbocharger boost levels (typically paired with Isuzu 4HK1, 6HK1, or 6WG1 engines).
- Monitor Controller: Processes machine operational data, liquid crystal display functions, and active fault logging via Controller Area Network (CAN bus) communication lines.
Engine Dial & Sensors → Main Controller (MC) → Pump Solenoids & Valves
(CAN-0 Bus)
Isuzu Engine Sensors → Engine ECM / DCU → Common Rail Injectors
(CAN-1 Bus)
Monitor Unit
When a breakdown occurs, determining whether the fault lies in the Main Controller, the Engine ECM, the connecting harness, or external sensor inputs is the first critical milestone.
5 Common Symptoms of a Malfunctioning Hitachi Computer Board
Before connecting diagnostic tooling, observing specific machine behaviors helps narrow down the failure mechanism:
1. Engine Will Not Crank or Dies Immediately
If the key switch is turned to the start position and the engine fails to crank while displaying a blank or frozen display monitor, the Main Controller or Engine ECM is likely experiencing an interruption in 24V DC power, a blown main controller fuse, or an internal micro-processor lockup.
2. Severe Hydraulic Speed Derate (“Turtle Mode”)
When the excavator operates in extreme slow-motion across all functions—boom, arm, bucket, swing, and tracks—the Main Controller has typically entered a safety limp-home mode. This usually stems from an internal pump driver failure or loss of CAN bus communication between the MC and engine controller.
3. Erratic Engine RPM or Loss of Throttle Control
If turning the engine speed control dial produces no response, or if engine speed hunting occurs under load, the signal voltage to the controller is compromised, or the controller’s internal analog-to-digital (A/D) converter circuit has degraded.
4. Persistent CAN Communication Alarms
Monitor alerts indicating CAN0 or CAN1 communication timeouts (such as code 11007-2 or 11009-2) point to a severed network line, a corrupted controller network transceiver chip, or improper terminating resistance across the network.
5. Burning Odor or Physical Board Discoloration
A distinct electrical burning smell coming from the cab storage compartment behind the seat indicates a shorted output driver transistor, usually caused by an externally shorted proportional solenoid coil or reverse-polarity battery jump-starting.
⚠️ 警告: Never jump-start a 24V Hitachi excavator using a 48V fast-charger or high-amperage boost charger without disconnecting the main computer board harness plugs first. Voltage spikes exceeding 32V DC will instantly rupture the controller’s internal transient voltage suppression (TVS) diodes and ceramic capacitors.
Key Hitachi Excavator ECU Fault Codes Demystified
Interpreting diagnostic fault codes correctly saves hours of shop labor. The following cross-reference table highlights common fault codes found across Hitachi ZAXIS (ZX-3 / ZX-5 / ZX-6) and EX series excavators:
| Fault Code | Affected Subsystem | Root Cause & Operational Symptom | First Diagnostic Action |
|---|---|---|---|
| 11006-2 | Engine Controller Harness | Loss of speed signal or harness break between MC and ECM. Machine hydraulics operate in slow mode. | Inspect harness continuity between MC connector and ECM pin rail. |
| 11007-2 | MC / CAN0 Network | CAN bus communication timeout at Main Controller. Hydraulic functions slow; monitor displays alert. | Measure CAN-H to CAN-L resistance (standard: 60Ω across parallel network). |
| 11009-2 | Monitor Controller | Communication fault between monitor unit and Main Controller. Screen freezes or misses operational vitals. | Check monitor supply voltage (24V) and monitor connector ground resistance. |
| 10514-12 (P060B) | Engine DCU / ECM | Internal DCU hardware failure or EEPROM checksum error. Engine fails to start or shuts down. | 检查主DCU接地;若电压纯净,则需更换控制器。. |
| E₀₉ / E₁₂ | MC内部逻辑 | 内部存储器(EEPROM)损坏(E₀₉)或CPU处理故障(E₁₂)。. | 重置控制器电源轨。若故障码持续存在,则需进行内部电路板台架维修或更换。. |
| 11101-3 / 11101-4 | 转速旋钮传感器 | 发动机转速旋钮信号电压异常偏高(对24V短路)或偏低(对地短路)。. | 测试油门旋钮电位计信号线(正常范围:0.5V至4.5V直流)。. |
| 11200-3 / 11200-4 | 液压泵传感器 | A泵输出压力传感器信号超出规定电压范围。. | 使用万用表测试压力传感器接头;验证5V参考电源。. |
如 沃尔沃工程机械5步诊断规程, 所述,结构化的诊断工作流程可防止维修人员仅依据单一故障码读数更换功能正常的部件。.
日立电脑板系统性5步诊断规程
为执行专业的 日立挖掘机电脑板故障排查 流程,请遵循以下5步车间规程:
第1步:物理检查 → 第2步:电源与接地测试
第4步:CAN总线电阻 < 第3步:5V参考电压检查 → 第5步:模块隔离与台架测试
第1步:目视及物理线束检查
首先打开操作员座椅后方的控制器舱。.
- 检查线束插头的锁紧卡扣是否松动、端子针脚是否退出,或是否存在绿色氧化铜腐蚀。.
- 检查多针铝制连接器壳体内部是否有油液或水分侵入。.
- 检查沿动臂框架和液压泵舱布置的外部线束是否存在磨损或挤压点。若外部线路损坏,使用精确匹配的 日立ZAX200 / ZAX230 / ZAX270液压泵线束 进行更换,可确保在重新测试控制器之前信号传输纯净。.
第2步:蓄电池供电电压与接地电阻验证
在判定电子电路板故障之前,确认带载状态下有纯净电源到达该单元:
- 将数字万用表调至直流电压档,在钥匙开关置于ON位置时,探测控制器线束接头处的主24V电源针脚。.
- 供电电压必须与蓄电池端电压一致(通常为24.5V至27.8V直流)。.
- 将万用表切换至电阻档(Ω),从控制器接地针脚测量至主机底盘车架。接地电阻必须测量 低于0.5Ω. 。接地悬空会导致不稳定的电压尖峰,模拟内部电路板故障的现象。.
第3步:传感器输入与5V参考电源检查
日立控制器生成稳定的5.0V直流参考输出,为外部传感器(如泵输出压力传感器和发动机转速旋钮)供电:
- 探测压力传感器线束处的5V参考针脚。.
- 若电压读数为0V或降至4.5V以下,逐一断开外部传感器。若拔下某一特定传感器后5.0V恢复,则该传感器存在内部短路,拉低了控制器内部稳压器电源轨。.
- 若所有传感器均拔下后5V仍然缺失,则电脑板上的内部5V稳压芯片已损坏。.
第4步:CAN总线网络电阻测试
通信故障通常由线路异常引起,而非微处理器损坏。根据 Fairtrade Machinery的CAN总线诊断规程, ,测试网络终端电阻是验证数据链路完整性的标准方法:
- 关闭钥匙开关并断开蓄电池接地开关。.
- 在诊断接口或控制器接头处测量CAN-High与CAN-Low端子针脚之间的电阻。.
- 标准值:配备两个120Ω终端电阻的健康并联CAN网络的电阻值恰好为 60Ω (公差:58Ω–62Ω)。.
- 诊断规则:
- Reading 120Ω:一根终端电阻或线束开路/断路。.
- Reading 0Ω或接近0Ω:CAN-H和CAN-L导线相互短路。.
- Reading 无穷大(OL):整个网络开路。.
步骤5:模块隔离与台架测试
如果电源、接地、传感器5V参考电压轨和CAN总线线路均通过万用表测试,但设备仍持续显示内部CPU/EEPROM错误(如10514-12、E₀₉或E₁₂),则应将电路板隔离进行台架测试或板级更换。.
详见 Sinocmp的挖掘机控制器工作原理指南, ,台架测试包括向电源引脚提供24V直流电,并使用示波器或逻辑探头监测晶振脉冲和微处理器输出驱动器。.
专业提示:在执行线束或传感器维修后,务必记录并清除活动故障码。断开主电池接地开关3分钟以重置控制器存储器,然后重新上电,确认故障码是立即返回还是仅在液压负载下出现。.
台架维修与板级更换:维修厂的决策框架
当日立电脑板确认故障时,维修厂管理者面临元件级台架维修与整板更换之间的选择:
已确认的ECU故障
轻微线路/驱动器故障
- MOSFET驱动器烧毁
- 引脚焊点腐蚀
- 可更换继电器/二极管(台架维修可行)
处理器/EEPROM烧毁
- CPU开裂或短路
- 多层PCB烧毁
- 主程序损坏(整板更换)
元件级台架维修适用的情况
当损坏局限于外围输出电路时,台架焊接和元件更换是可行的:
- 电磁阀驱动器MOSFET短路:更换负责泵电磁阀控制的烧毁开关晶体管。.
- 冷焊点开裂:重新熔化因发动机振动导致的开裂引脚焊点。.
- 保护二极管击穿:更换因意外反极性辅助启动而在24V输入线路上烧毁的TVS二极管。.
需要整板更换的情况
在以下条件下,尝试台架维修不可行:
- 微处理器或EEPROM内部故障:CPU核心短路或存储器硅片损坏。.
- 多层印刷电路板(PCB)烧焦:碳化的板材料在内部铜层之间形成导电通路,无法隔离。.
- 大面积水损:深度腐蚀破坏了电路板上的微过孔。.
正如 YNF Machinery的挖掘机ECU维修完整指南, 所强调的,对于商业维修厂而言,用预编程的即插即用模块更换严重损坏的电路板,比花费数天时间在旧PCB上排查间歇性微裂纹要经济得多。.
延长日立控制器寿命的预防性维护
保护精密电子控制器免受恶劣工地环境影响,对于防止过早失效至关重要。请实施以下维修厂维护标准:
1. 保持接地连接和电池端子清洁
松动的电池电缆会在交流发电机每次运行时产生高压感性反冲。每运行500小时检查并清洁主机架接地,以防止浮动接地尖峰。.
2. 严格执行焊接安全措施
在挖掘机车架上进行电弧焊接之前:
- 关闭主电池断开开关。.
- 从主控制器、发动机ECM和监控单元上拔下所有线束接头。.
- 将焊接接地夹尽可能靠近焊缝连接——切勿跨过枢轴轴承或电子外壳夹持。.
确保防水外壳密封性
确认驾驶室橡胶密封条和控制器隔舱盖保持严密密封。控制器壳体内积聚的灰尘和冷凝水会形成爬电路径,导致高密度SMD元件之间发生短路。.
更换老化线束
振动、液压油侵蚀和热循环会随时间推移使导线绝缘层脆化。遵循全面的 挖掘机替换零件维护指南 可帮助技术人员识别硬化线束,并在短路损坏敏感控制器电子元件之前予以更换。.
采购工厂直供的日立替换电脑板
当需要更换控制器时,独立维修厂要求精确的型号匹配、预刷软件兼容性以及快速交付,以最大限度地减少设备停机时间。.
机器序列号和发动机型号
鸿腾达技术匹配 预编程即插即用ECU → 零停机安装
作为自2001年以来专业从事重型设备零部件制造和分销的厂商,, হংতেংদা পার্টস 供应专为日立挖掘机设计的工厂直供替换电脑板和电气元件:
- 预编程即插即用单元:替换ECU和主控制器已刷入针对特定发动机配置(如五十铃4HK1、6HK1或6BG1发动机系列)校准的精确OEM固件。.
- 精确OEM零件号匹配:全面覆盖日立机型,包括ZAX170W-3(SCM板 #9274929)、ZX200-3、ZX230、ZX270、ZX330-3、ZX350-5G(主控制器 #YA60001380)以及EX200-2/3/5系列。.
- 工厂级质量保证:采用重型铝制外壳、减振电路板以及适用于极端施工环境的高温连接器引脚制造。.
- 一站式电气元件采购:从电脑板和监控显示屏到完整的发动机和液压泵线束,维修厂可直接从制造源头采购完整的电气系统。.
维修厂负责人和采购经理可浏览 鸿腾达全面的日立挖掘机零件目录 以查找兼容的电脑板,或查阅 独立维修厂日立零部件采购指南 以获取详细的交叉参照和技术安装支持。.
独立维修厂摘要
掌握 日立挖掘机电脑板故障排查 需要结构化的诊断思维:
- 切勿首先假设电路板已损坏:务必验证带负载下的24V直流电池电源、底盘接地电阻(<0.5Ω)以及5V传感器参考电压轨。.
- 使用CAN总线测量:验证CAN-H和CAN-L之间60Ω的网络电阻,以在判定通信硬件故障之前排除线束断路。.
- 防止重复故障:在插入新的替换电路板之前,检查电磁阀和线束是否存在短路。.
- 与可靠的工厂供应商合作:使用预编程、即插即用的电脑板,确保设备快速恢复运行并保护维修厂利润。.
如需即时技术支持或验证日立电脑板的OEM零件号,, 请联系鸿腾达零部件的工程专家.